
So you’ve set up your blog, connected WordPress to your hosting website (which hopefully choose BlueHost), and you think you’re ready to start writing. Well, you’re more like half way done. There are a few other key points we need to discuss about WordPress, themes, and the different plugins and widgets to choose from. If you haven’t already checked out Part 1 to this post, then please click over to this post titled How to Start a Profitable Blog to begin the process of creating your blog.
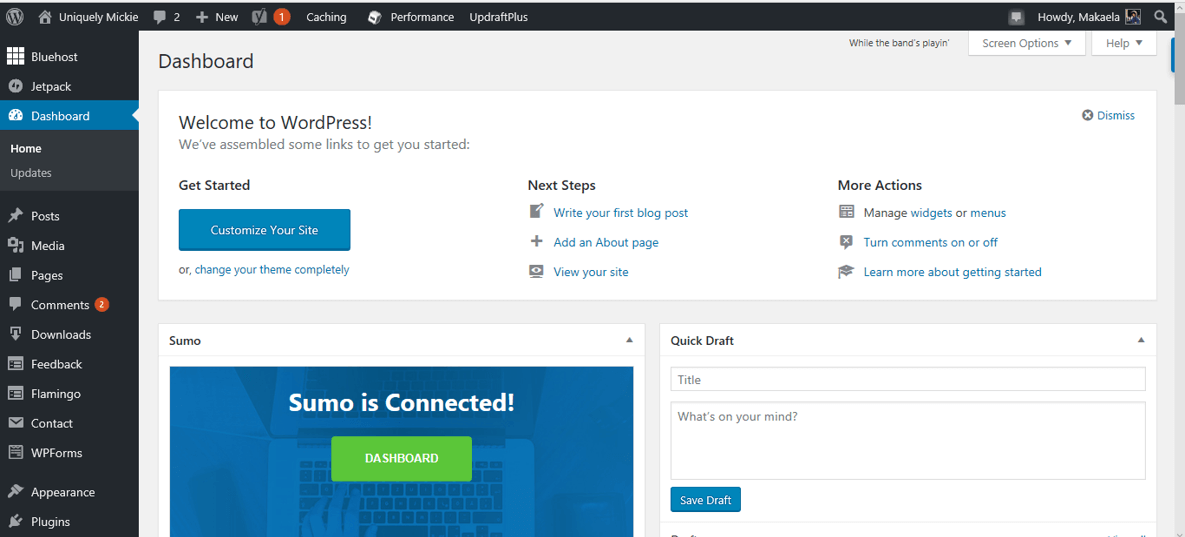
When you first log in to WordPress, it can seem quite confusing, but I promise you it’s not. It’s actually quite simple. The bulk of WordPress is the sidebar, this is where everything you need is located.
![]()
Posts: This is where the magic happens, aka where you write all of your posts or edit old ones. This is basically where I spend the most time on besides the comments page.
Media: When you upload a photo into a post or add a feature photo, this is the page where all of that information gets stored to. But you have access to this page in the post editor, so I never have to use this tab.
Pages: This is basically the header of your website so you can change the layout of your navigation bar or add pages to it. Typically, you’ll want to have an “about me” page, a “contact me” page, and your topics that you’ll write about on your blog
Comments: This is the page where you’ll see all of the comments made on your page! I use the comment widget that came with my theme that I installed, but there are plugins that you can download to change the look of the comment sections.
Appearance: At the start of your blog, this is the page that you’ll spend the most time on deciding how you want your blog to look like. You can add customized Instagram feeds, headers, color changes, and anything else you imagined your blog to have.
Plugins: Plugins are like really cool add-ons to your blog that can do a numerous of things, including speeding up your website’s loading time or adding in pop-ups.
Users: It’s your blog so you’ll be the only user.
Tools: This page has import and export options, but I’ve never had to use this and you probably won’t either.
Theme
If you don’t know what a theme is, it’s basically the outfit for your blog. It’s the backbone of what your blog will look like. There are plenty of paid options, but if you’re just starting out, then I would just find a free one to use instead. You want to be positive that blogging is for you before you start investing in brand designs and expensive themes. Once you find a theme you like, just follow the instructions to download and active the theme. Once you’ve down that, your theme should be up!
Add Pages and Posts
Now this is where the fun part begins because this is where you get to add your content! The first page that you need to work on is your “about me” page. I know it’s the most awkward thing having to talk about yourself, but it’s really important. I love reading other people’s about me pages. It allows your viewers to really connect with you on a personal level.
After you finished writing that page, you can start to add any other pages that you want to create, such as a contact me page, tabs for each topic you want to blog about, and a reference page. A reference page is where you can list out all of your favorite products or anything else that you enjoy so your viewers can easily access that information.
The next step is to create your first post or posts. What you want to write about is totally up to you as well as the number of posts that you want to create before you launch your blog. You can start with an introduction or start right off with your content.
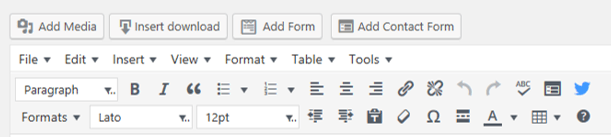
The dashboard in the post editor is where you can customize how you want your blog post to look like. You can add pictures thru the “Add Media” button, which is what I was talking about earlier. If you are familiar with Word, the dashboard looks very similarly to the Word dashboard. The slight modifications are you can add a “read more”, add special characters, quote your text, and add a line through the body of your post.
It’s pretty straight forward once you get the hang of the dashboard.
Plugins and Widgets
The best part about WordPress is the added bonus that you get called plugins and widgets that allow you to customize your website to the max! There is literally a plugin or widget for everything you could possibly want for your blog.
But be careful that you don’t add too many or they’ll bogged down your website and make the loading time slower.
Here are the ones that I recommend:
- YoastSEO: This is going to give you the tools and guidance on search engine optimization. SEO just means that your website is more likely to be indexed on the big search engines, such as Google and Yahoo.
- WP-PageNavi: This plugin will create a page index at the bottom of your blog so your viewers can skip through the numerous blog posts.
- WooCommerce: If you want to sell items on your website, then this is the plugin for you. I just created my first e-book and this is the plugin that helped me get my product on my blog.
- W3 Total Cache: This will help your website load faster and smoother, especially if you have a lot of pictures on your blog.
- Updraft Plus- Backup & Restore: This is going to back up and restore your website if it ever goes down. You don’t want to lose all of your hard work so this a necessity, if you ask me.
- Instagram Feed: Add your Instagram feed to your sidebar with this widget!
- Better Click to Tweet: This is going to allow you to add tweet boxes in your post and allow other people to tweet a quote or message from your post.
- Subscribe: I personally use Convertkit for my subscriber list, but you can totally use a Mailchimp or another service if you don’t want to pay for it at the moment. Either way, it’s really important as a blogger to create an email subscription list.
Well, there you have it! If you actually learned how to use WordPress to its full capacity, you’re ready to go and start making your blog a business. If you have any questions, please don’t hesitate to sending me an email! I would love to help in any way that I can.
You may also like: 6 Things I Wish I Knew When I Started Blogging, 5 Tips to Grow Your Email List On Autopilot, and The True Story About How to Make Money Blogging