
Since I started blogging, I’ve gotten a lot of questions on how to start a blog and the inside scope of blogging. While I am still a newbie at blogging, I’ve learned so much in a small amount of time, especially how easy it is to start your own website and brand. Blogs are becoming really popular as more people would love to work from home. They are also a great way to share to your experience and challenges with the world. A lot of people who ask me questions think you have to be a computer major, but you totally don’t have to so don’t stress about it.
So without further do, here’s my step by step guide on how to start a profitable blog!
Isn’t Starting a Blog Hard?
Nope, not at all! I totally thought it would be, but once I got started, it was as easy as 1, 2, 3. While it’s useful to know some coding beforehand, it’s definitely not required. The only piece of knowledge that you need to start creating your own blog is to know how to work a computer. In this post, I am going to show you step by step on how to set up your own blog and hopefully sway you to make a self-hosted website as opposed to .blogger.com or .wordpress.com
Why Start a Blog?
- It’s an outlet: I use my blog as a creative space to write my thoughts and to help others through my writing.
- Networking: When you have a blog, you get the opportunity to meet a bunch of amazing bloggers and readers that welcome you into the community with open arms. It’s really been great having a built-in support system on the internet.
- Income: I started my blog in the hopes that one day I could make a full time income from working from home and helping to inspire others. Isn’t that like the American dream nowadays? Work less, but earn more!
Self –Hosting is always the way to go
If you look up at the url section, you’ll see where it says www.uniquelymickie.com, there’s no .blogger or .wordpress attached to the url. That means that I own my website and have entire rights to anything I post on my blog. The first time I started a blog, I used a free hosting service and, ultimately, the original blog idea failed and fizzled out. The second time around I spent a lot of time researching my options and realized that if I wanted to make my blog a business, then I needed to take it seriously.
Eventually, I bite the bullet and invested in my own domain (aka paid for self-hosting). Why do you ask? Let me explain my reasons for doing so:
- I wanted to be my own boss and when you own website, you get to be the boss. Free websites such as blogger and wordpress.com have total rights over what you post and can even take down your whole website in a blink of an eye, just because.
- I wanted to be taken seriously as a writer and as a blogger. You can be a serious blogger not having your domain, but it’s a lot easier to build trust and loyalty with your own website.
- I wanted this hobby of mine to come a real life source of income. With any hobby, you have to make a small investment to get started and to start making money.
What You’ll Need to Begin:
- 30 minutes or so for step up
- A computer
- A debit or credit card
- Time dedicated to working on your blog weekly
Step one: Hosting
At this point of the process, this is where you have the option to use a free website, such as blogger or blogspot.com. But as I mentioned before if you wanted to be a serious blogger and start making money, then you’ll need to have a self-hosted domain. At the same time do whatever your budget allows at the moment and you can upgrade later on.
When I was researching on how to start a blog, there were a million hosting options to choose from, but I wanted something that would be simple to use and effective in power. It didn’t want to pay for all of the fancy whistles or any other tools that I wouldn’t use or know how to use to begin with.
I eventually ended up choosing BlueHost for numerous of reasons, such as affordable price, 24/7 help service, and unlimited bandwidth. Another great aspect of BlueHost is that I’ve never experience downtime or a lag in downloading my website, which is a great plus for keeping viewers on your page.
Now to the fun part of bringing your website to life! Just go to the BlueHost website and click on the big green button that says “get started now”.

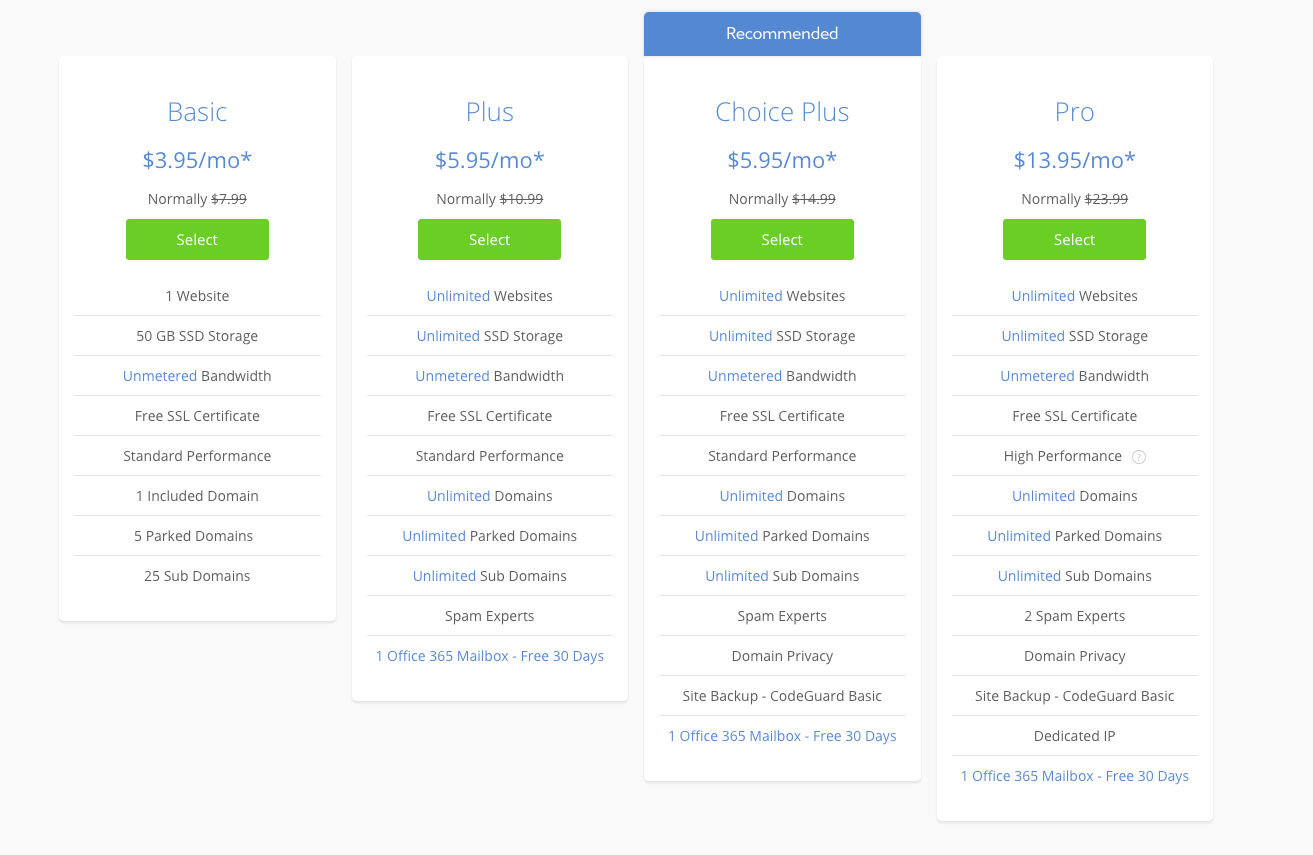
Click it and you’ll be presented with three choices for your plan. I recommend going with the cheapest one, but it’s very unlikely that you’ll need to upgrade to anything bigger. You’ll definitely have the option to upgrade later on if you need to. I currently have the cheapest plan for Uniquely Mickie at the moment.
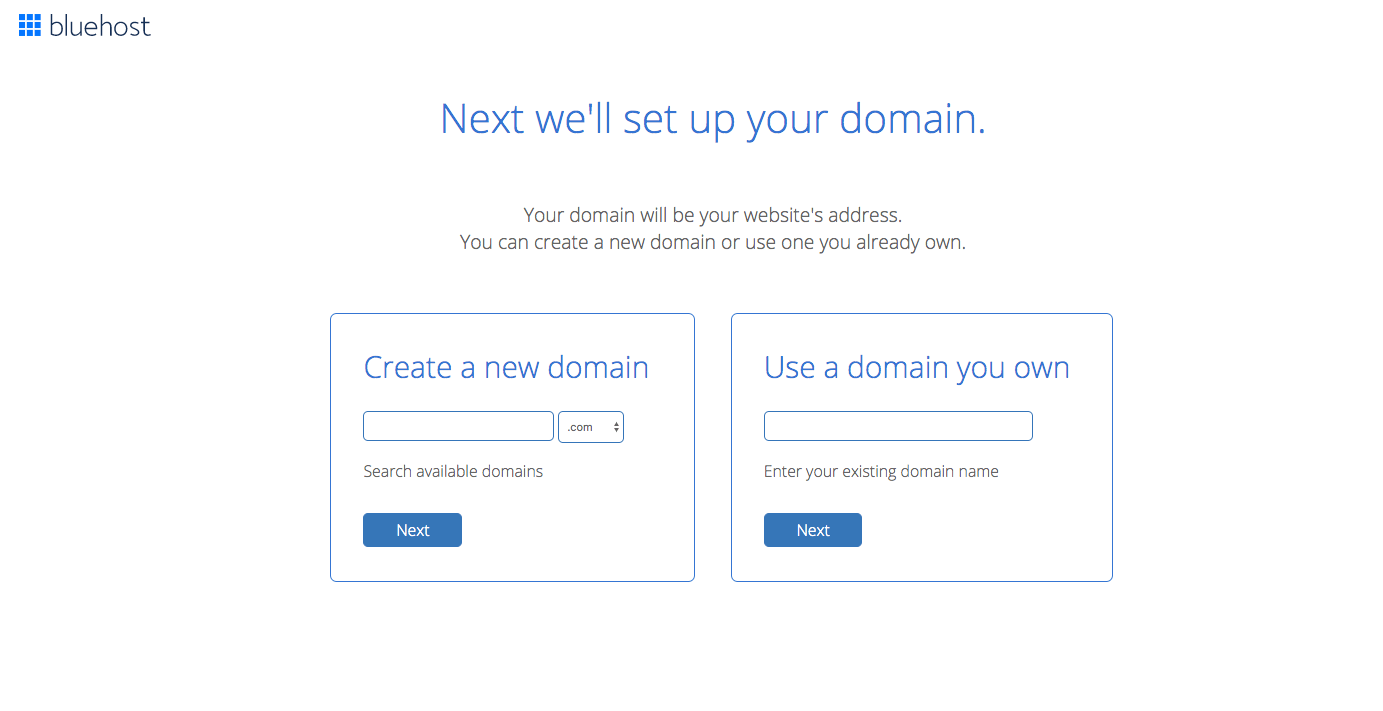
The next step is to register your domain. You’ll want to take your time when deciding your domain name because it’s a complete pain to change it later on and it needs to be easy for your viewers to remember it. Keep these tips in mind:
- Don’t use numbers: Do I even need to explain? Your domain isn’t a username or password so no numbers unless that’s the name of you clothing brand or something, then leave out the numbers.
- Keep your options open: If you are blogging about multiple topics, then you don’t want to limit yourself by labeling your blog as only one topic, such as allthingslifestyle.com, when you might talk about fashion. If a person sees that your url states a single topic, then they won’t come to your site looking for beauty or fashion posts. Keep your domain broad and simple.
- Choose something that you won’t outgrow: As we grow older and we mature, our thought process also changes. You don’t want that to happen to the name of your domain. You want something that will be timeless and something that you won’t outgrow as you get older and your blog matures.
- Choose something that will draw in your target audience: If you are thinking of targeting a certain age group or any other demographics, then you’ll want to target the name of your domain to something that they will enjoy.
Now type in the new name of your domain and choose the .com option. I highly recommend sticking with .com just because it’s the norm for a blog and easier for your viewers to remember.
Next, fill out your account information, choose an account plan (I recommend doing at least 1 year), and then you can pick your add-on bonus. I skipped the other add-on bonus except for the Domain Privacy Protection, which keeps your personal information sealed from anyone looking up your domain.
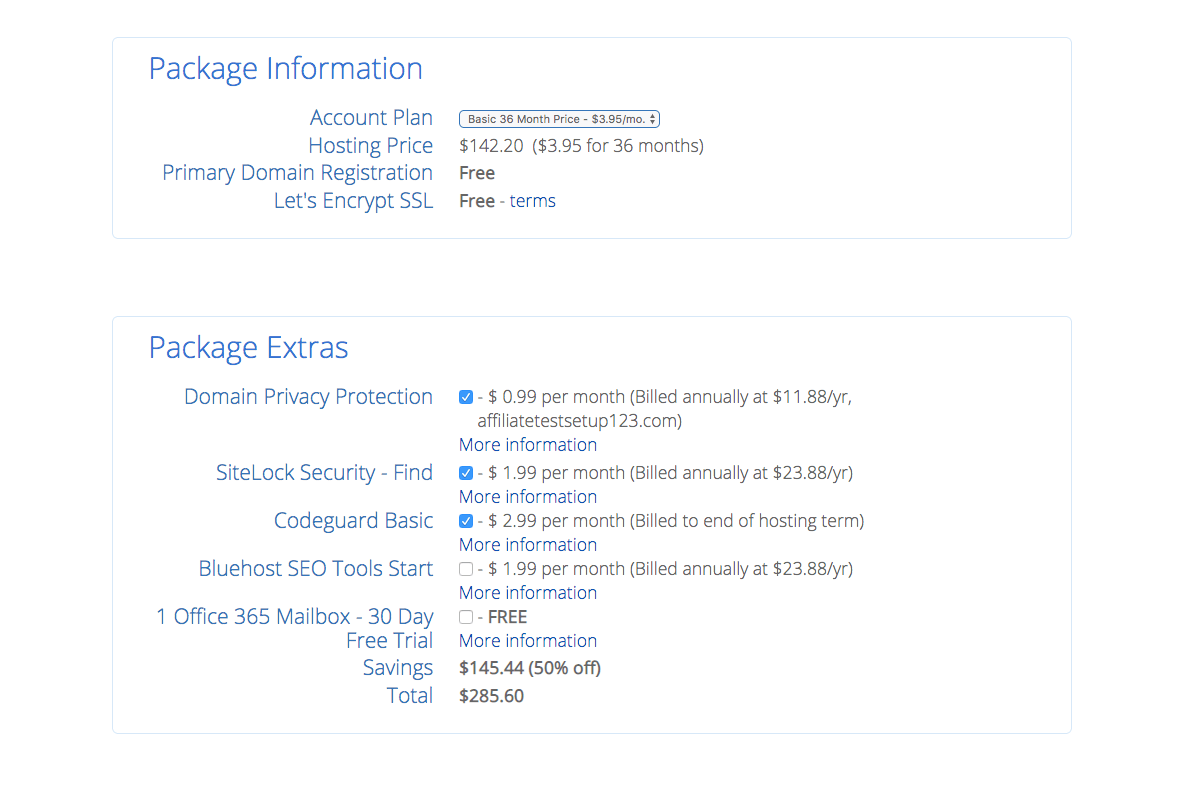
Then fill in your payment information, click submit, and you just created the backbone for your blog!
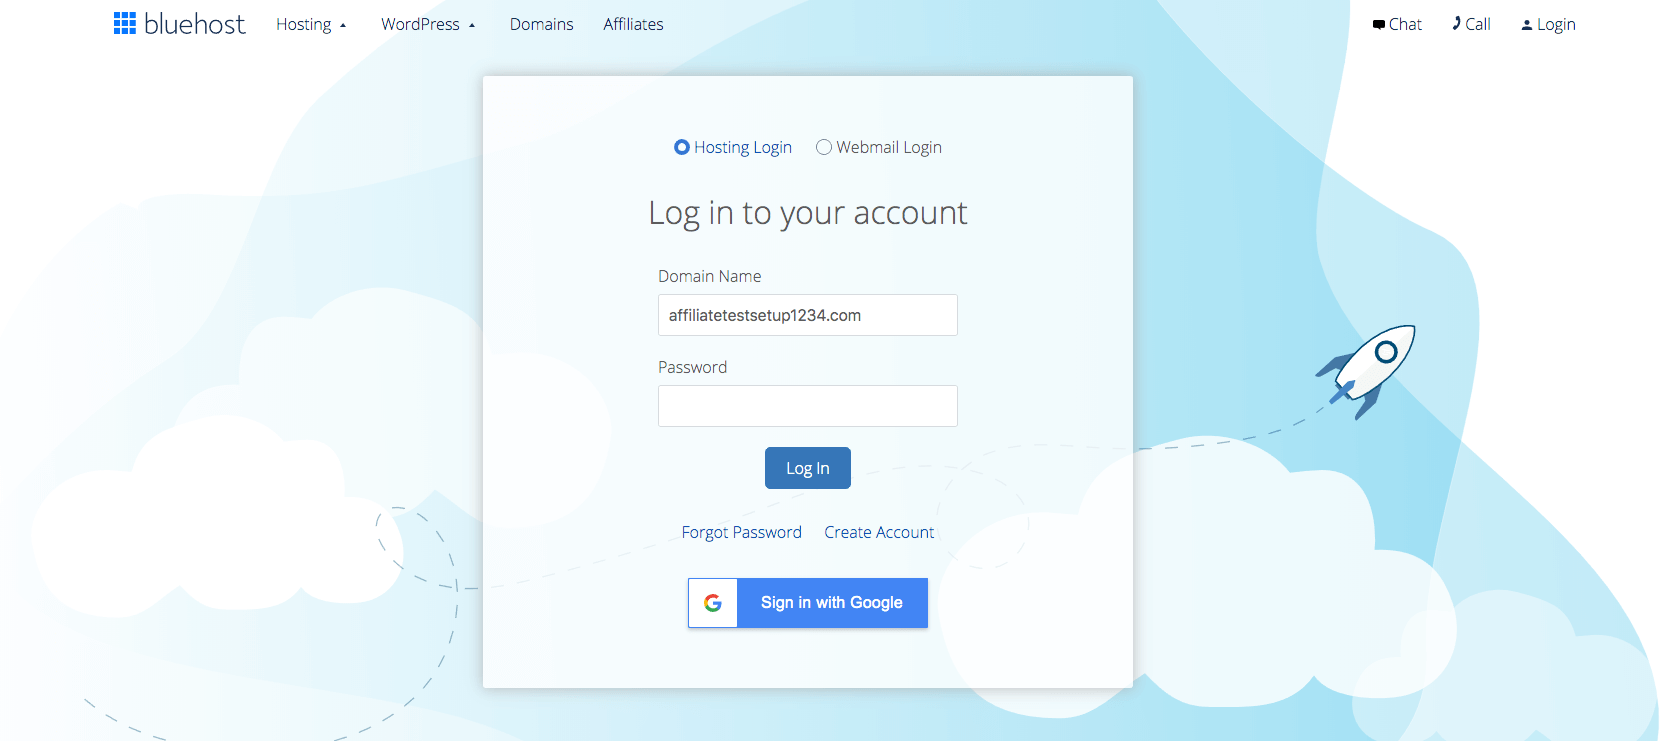
Step Two: Linking up WordPress to your BlueHost account
Bluehost made this step super easy with only a single click of your cursor. So after paying the hosting bill, you’ll login in under the “hosting login” option. You can choose either to login in through your gmail account or use the account information from the welcome email that you received from BlueHost.
After logging into your cpanel, click the “Install WordPress” icon on your dashboard under the website builder header. You’ll then click the green button that says “continue installation”.
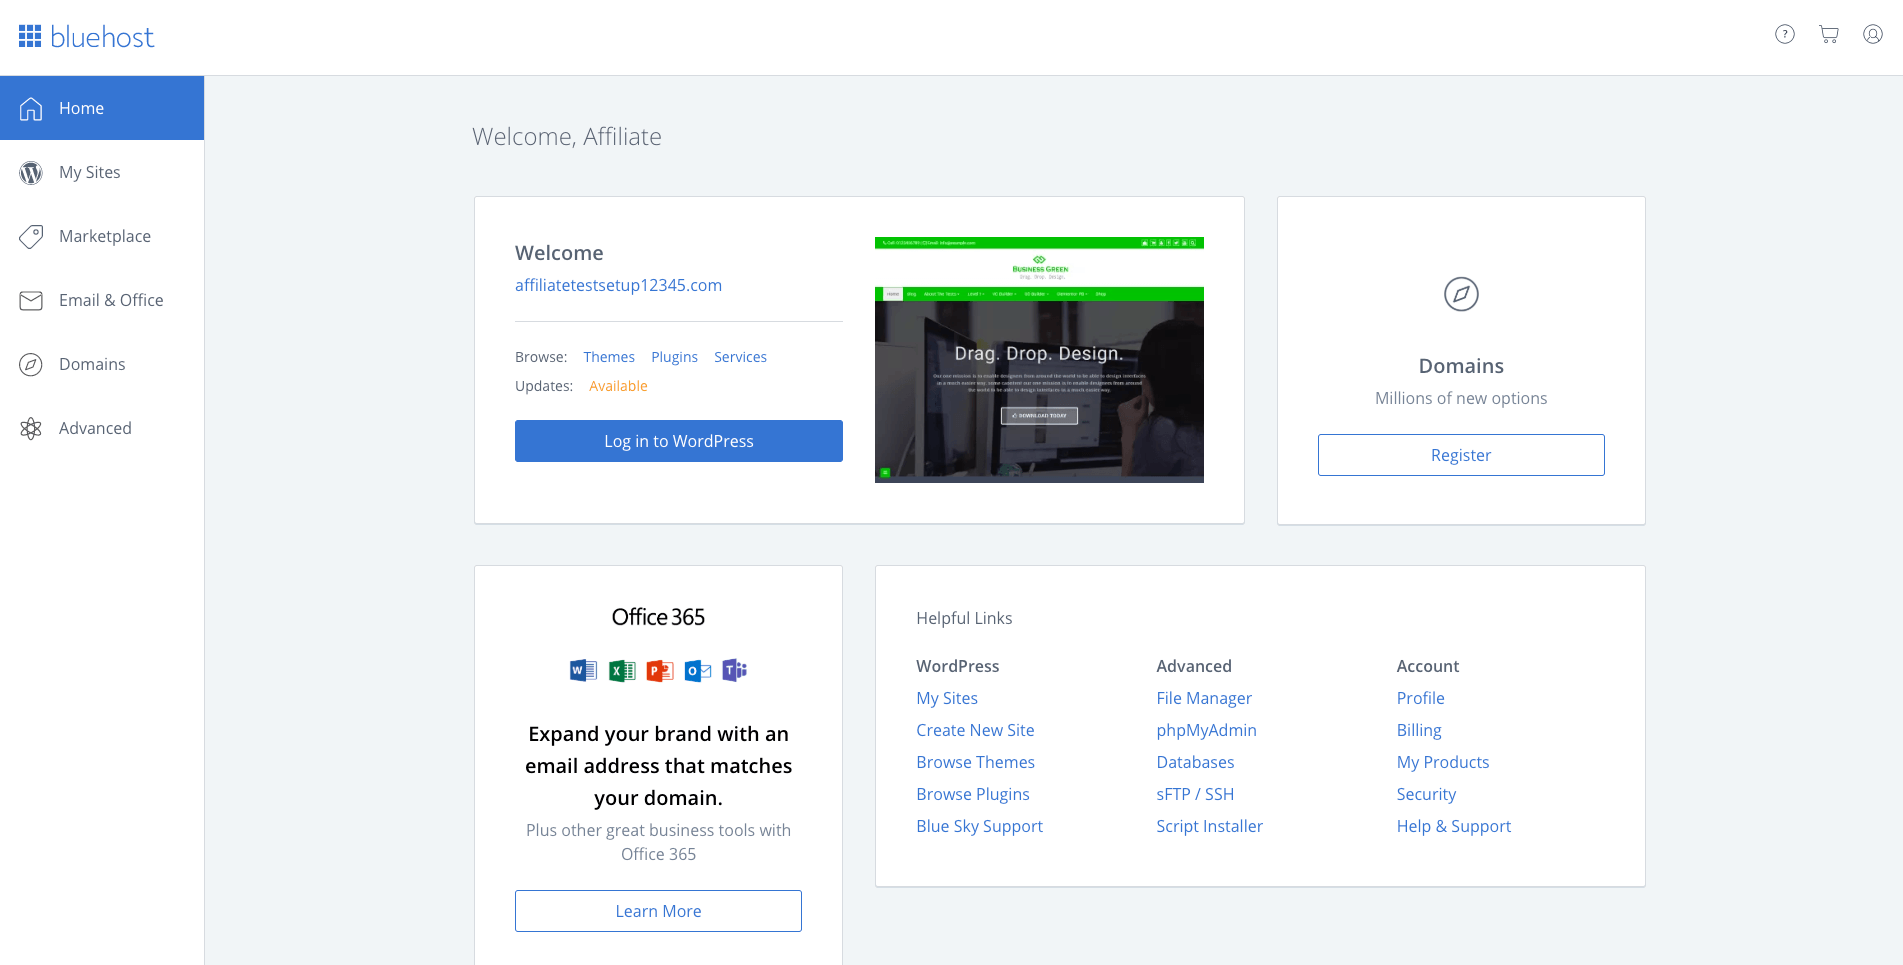
Once the install is complete, the website will ask you to type in your WordPress account information or to create one, if you don’t already have one.
Ta-Da, You Did It!
You’re officially a blogger now! But that was just the beginning, it’s now up to you to post regularly, engage with your viewers, network with other fellow bloggers, and make great content that everyone will be dying to read. The last tip of advice that I can give you for your new journey is to just have fun with blogging!
Please don’t hesitate if you have any questions or just want to chat with me, then just send me an email. I would be more than willing to help you regarding topics such as networking, setting up your blog, or any other questions that you might have.
You may also enjoy: Blogging Basics 101: All About WordPress, 6 Things I Wish I Knew When I Started Blogging, and The True Story About How to Make Money Blogging